Smart Glass Products
Make ordinary glass extraordinary

Smart Glass
Smart Film
Smart Glass Doors
Electrochromic Glass
Smart Glass Spaces
Buy Samples
Online Calculator
Smart Glass Applications
Discover how smart glass is being used to for privacy, security and smart design.

Smart Glass Information
We love sharing our industry knowledge, ideas and design tips!

Blog
FAQs
Warranty
Projects
Installation Guide
PRICE
Partner with Us
Wiring Smart Glass & Smart Film on Swing Doors Using a Power Loop
Learn how to wire smart glass and smart film on glass doors with step-by-step instructions, videos, wiring diagrams, troubleshooting tips, and best practices. Discover how power loops create clean, safe, and reliable connections for any swing door setup.
Quick Overview of Wiring Smart Glass Doors With Power Loops
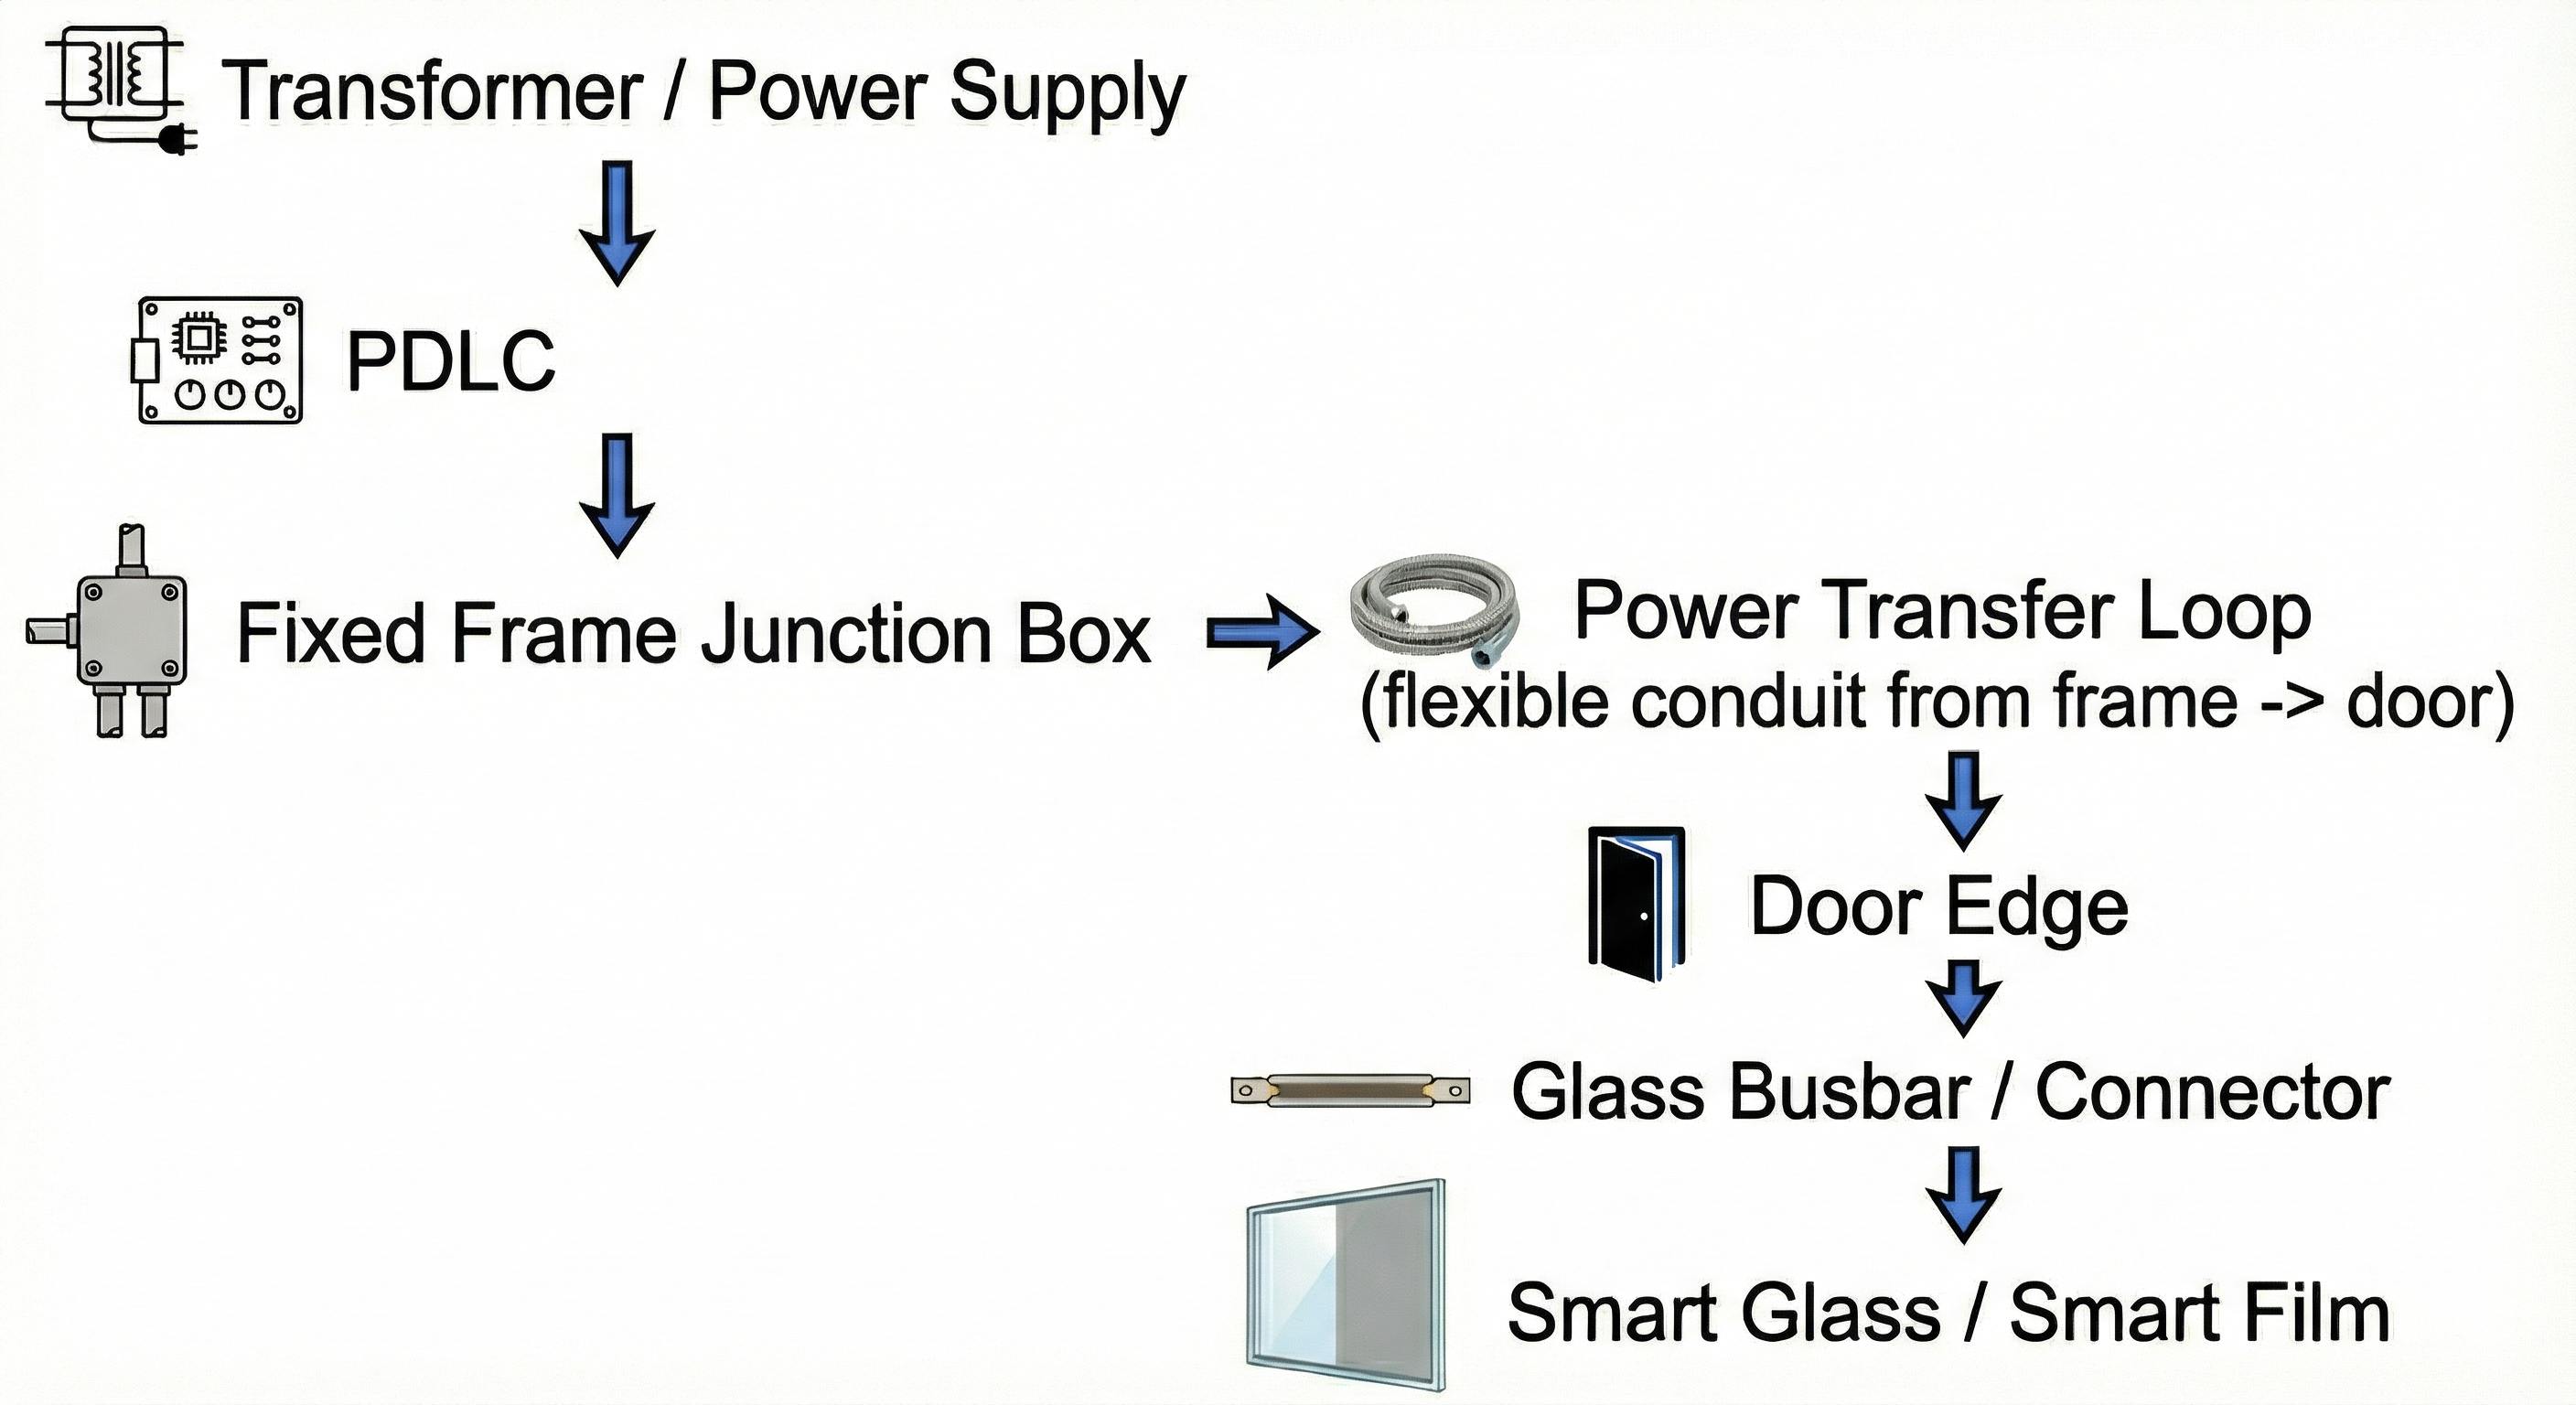
Wiring smart glass and smart film on a moving (swing) door requires a flexible, protected electrical path from the fixed frame into the moving glass. A power transfer loop (also called a power loop or mini power loop) routes low-voltage power through a flexible conduit or hinge so busbars at the glass edge can be fed by a transformer and controller. Use concealed loops whenever possible, follow busbar polarity and connector specs, protect wires from repeated flexing, and verify transformer sizing with your PDLC / switchable glass datasheet.
Keywords used: smart glass, smart film, smart glass doors, switchable glass doors, power transfer loop, power loop, mini power loop, smart glass wiring, wiring smart film.
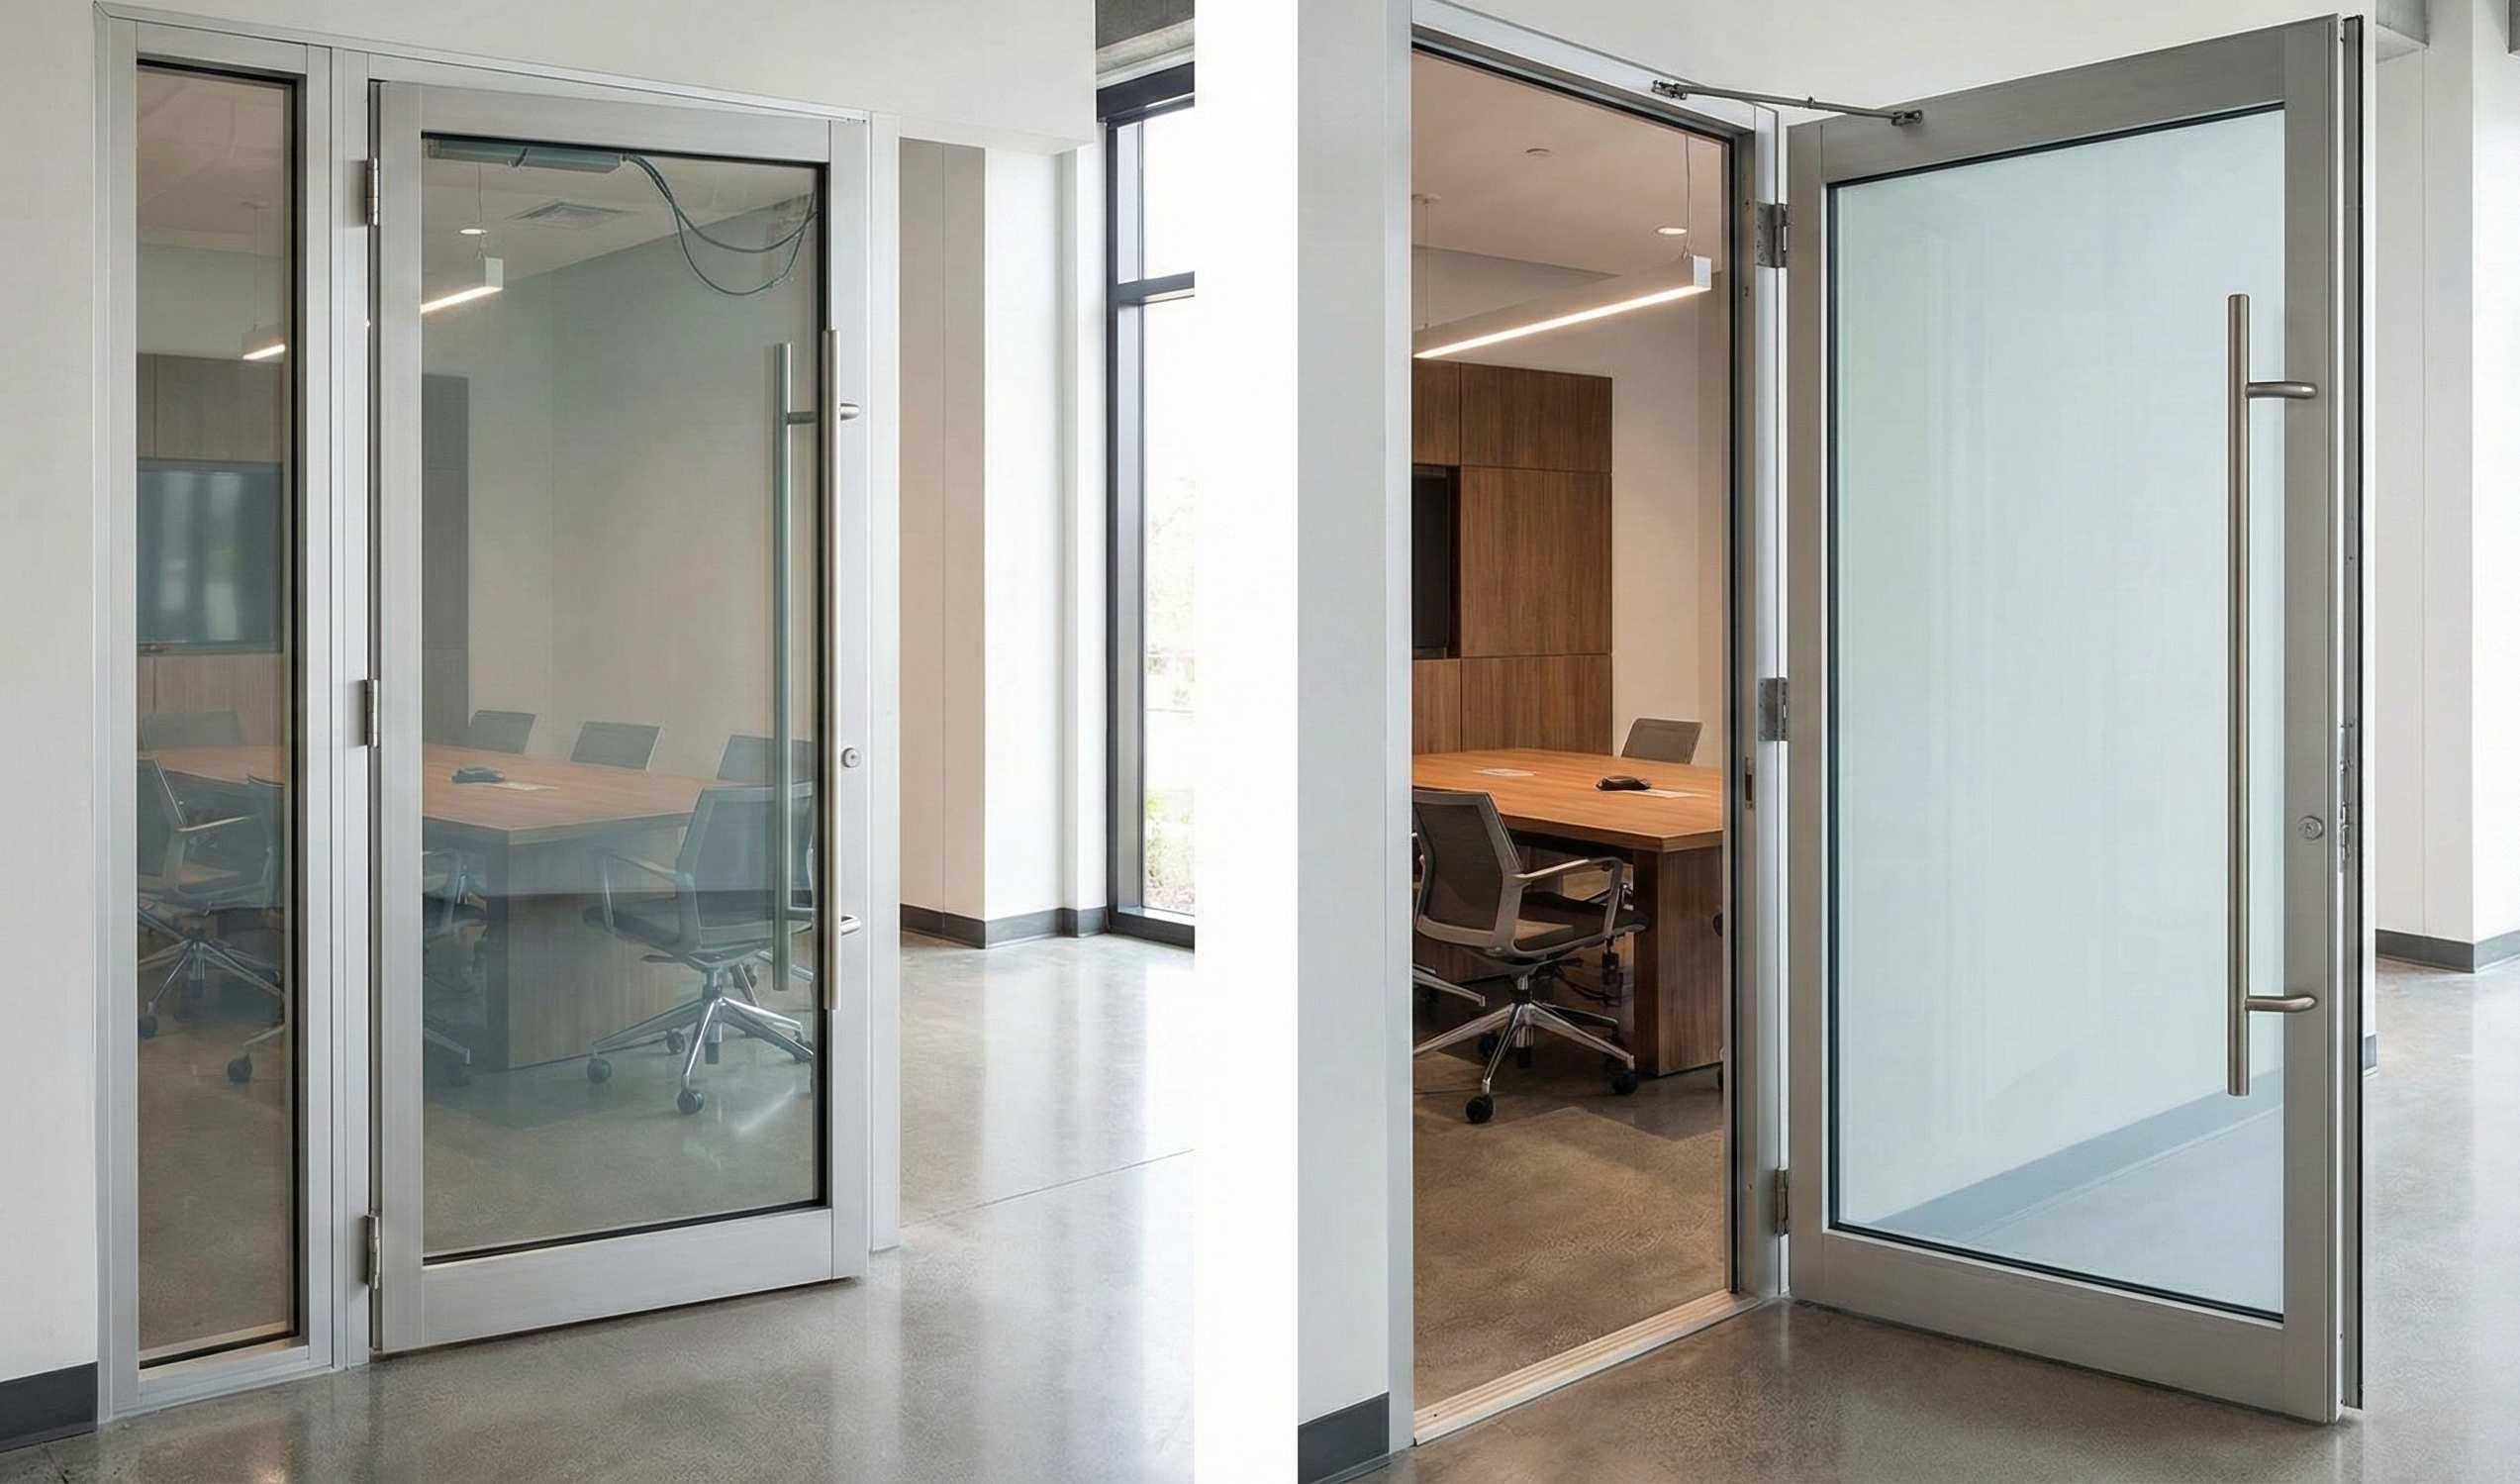
Why a Power Transfer Loop is Ideal for Smart Glass Swing Doors
- Motion protection: Wires that move with the door are subject to fatigue and pinching. A power loop contains the cable in a flexible, armored conduit (gooseneck) preventing damage.
- Aesthetics: Concealed loops or mortised loops keep wiring hidden for a clean look — critical in hospitality and high-end interiors.
- Security & reliability: A protected pathway reduces tampering and keeps power delivery stable for privacy switching.
- Compatibility: Power loops are a proven solution used for electrified hardware (locks, exit devices) and are ideal for switchable glass doors too.
Interested in other wiring scenarios for switchable glass doors? Visit our smart glass wiring guide.
Typical System Components (items you will see / need)
- Smart glass or smart film (PDLC) panel with busbars along the edge.
- Busbar connectors (solder tabs, crimp terminals, or manufacturer-supplied connector assembly).
- Power transfer loop (flexible conduit; surface-mounted or concealed mortise style) or power transfer hinge / magnetic connector for some designs.
- Low-voltage transformer / power supply and PDLC-compatible controller.
- Low-voltage wiring (gauge per installer manual — commonly 18–22 AWG for short runs, but confirm).
- Fasteners, grommets, strain reliefs, and firestopping where cables pass walls/ceilings.
- Multimeter and test equipment for commissioning.
NOTE: Check your specific PDLC / smart glass datasheet for exact voltage/current and connector requirements. Manufacturer specs always take precedence.
Step-by-Step Installation: Swing Door Wiring with a Concealed Power Loop
1. Plan & specify before cutting or mortising
- Review the smart glass / smart film product data (voltage, polarity, maximum run length).
- Decide loop type: concealed mortise loop (preferred for aesthetics) or surface-mounted loop (faster install). Mini power loops are used when space is tight (narrow frames/stiles).
- Locate transformer/controller in an accessible but discreet place (ceiling void, adjacent wall cabinet).
- Confirm cable lengths + slack for full door travel.
2. Prepare the door & frame
- Verify stile depth and decide routing through stile → door loop → frame.
- Pre-drill access holes for concealed loops if using mortise type. Use grommets and strain relief at pass-throughs.
- If using a power transfer hinge or magnetic connector, confirm compatibility with door thickness and glass edge clearance.
3. Install the power transfer loop (conduit)
- Mount one end of the conduit securely to the fixed frame and the other to the door edge (or hinge area), following the hardware instructions.
- Ensure the conduit’s gooseneck can flex throughout the door’s full swing without pinching or over-stretching.
- For mortised loops, test fit and finish before final sealing.
4. Pull and secure the wiring
- Pull the low-voltage cable from the transformer location through the wall/ceiling into the frame junction box.
- Feed the cable through the power transfer loop conduit into the door stile and to the glass edge.
- Use cable clamps inside the door and frame to prevent movement at connection points. Always use strain-relief.
5. Connect to the busbar / glass edge
- Expose the glass busbar connection point per the product instructions (some smart film systems have busbars pre-laminated; others require connector assembly).
- Use the manufacturer-recommended method to attach the wires to the busbar: soldering, crimp terminal, or dedicated connector block. Maintain correct polarity.
- If magnetic connectors or specialized plug assemblies are provided, install per the vendor instructions for a serviceable connection.
6. Tie into controller + transformer
- Connect door-side cable end at the fixed-frame junction box to the PDLC controller input, respecting polarity and connector type.
- Connect controller to transformer/power supply according to the controller manual.
- Install any switches (momentary, toggle), relays, or integration with building automation (if required).
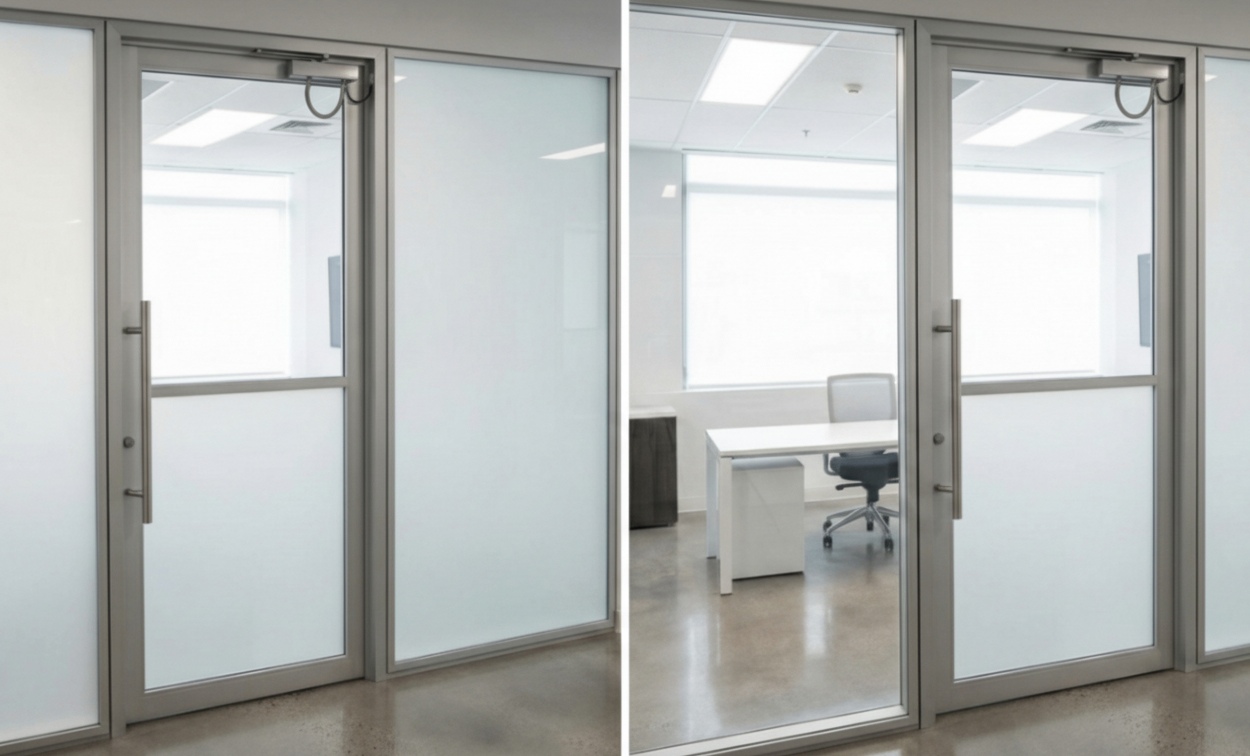
7. Test & commission
- Before final sealing, test continuity and resistance with a multimeter.
- Power the system and cycle the glass between clear and private states. Verify switching reliability while moving the door through full range of motion.
- Inspect the conduit flex, cable slack, and strain relief; make adjustments as needed.
- Record all wiring changes, label wires, and capture photos for the installation record.
Best Practices & Pro Tips
- Use concealed loops when possible — they give the cleanest finished look.
- Keep transformer/controller accessible (ceiling void or service panel) for maintenance.
- Label both ends of every cable — makes future troubleshooting fast.
- Avoid sharp bends where the cable exits the conduit — use grommets and small-radius supports.
- Protect cable from snagging by securing inside the door with clamps.
- Confirm wire gauge for the run length and current; longer runs may need heavier gauge to avoid voltage drop.
- Use flexible, armored conduit rated for door motion and with an expected life-cycle equal to the door use.
- Use serviceable connector solutions (e.g., magnetic connectors, quick disconnects) where access is needed for glass replacement.
- Coordinate with door hardware vendor — electric locks and other electrified devices may share the loop and need segregation or separate conductors.
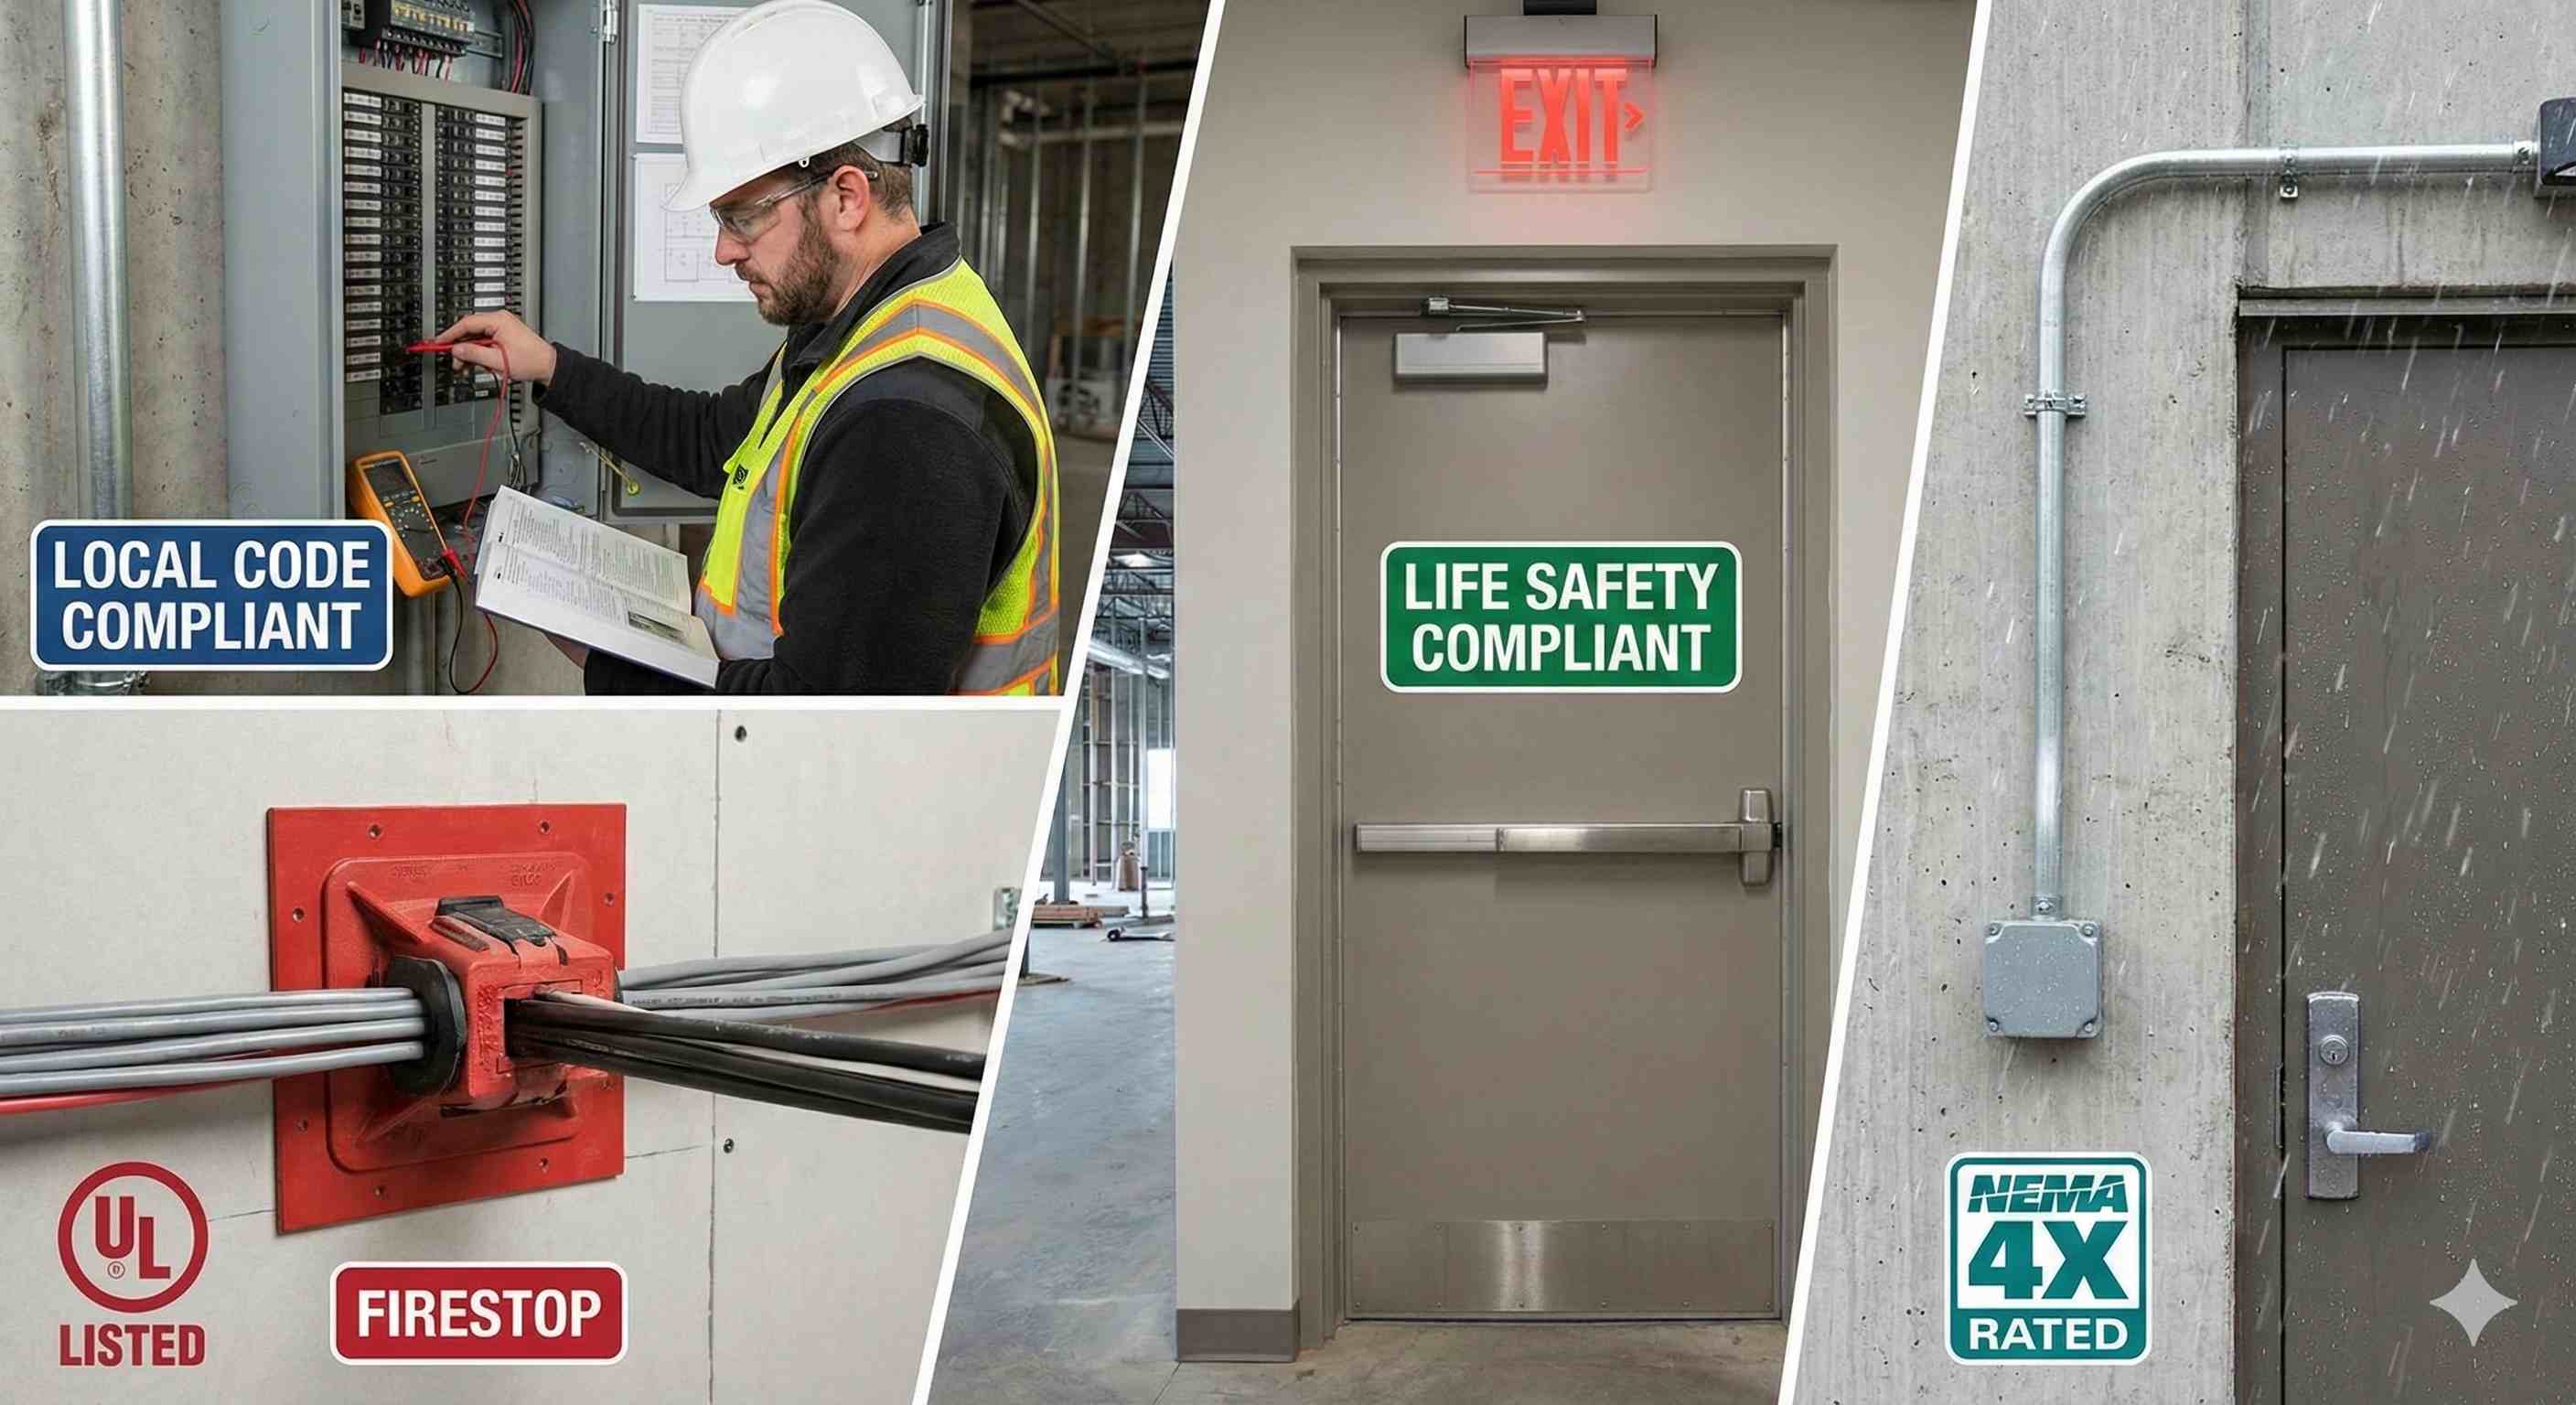
Safety, Regulations & Codes
- Always follow local electrical codes. Even though PDLC is typically low-voltage, local code may require qualified electrician involvement.
- Maintain required fire ratings where cables pass fire walls; use listed firestop systems if necessary.
- If the door is on an egress path, ensure all electrified hardware complies with building and life-safety codes.
- For exterior doors, use weather-rated components and ensure conduit is rated for environmental exposure.
Troubleshooting & Common Issues
Symptom: Glass does not switch.
- Check transformer and controller power LED.
- Verify busbar connections and polarity.
- Confirm cable continuity through power loop (multimeter).
Symptom: Intermittent switching when door is moving.
- Inspect cable strain relief and check for pinching inside conduit.
- Ensure connector contacts are secure and not oxidized.
Symptom: Visible arcing or heat at connector.
- Power off immediately. Likely poor connection or undersized wire for current. Inspect and replace connector; consult manufacturer.
Symptom: Noise or hum during switching.
- Could be controller grounding or interference. Verify grounding, controller mounting, and nearby EM sources.
Accessibility & Automation Integration
- Consider mounting controllers so they can connect to building automation systems (BACnet, KNX, RS-485, dry contact).
- For ADA or touchless operations, integrate switching with occupancy sensors or voice/automation triggers.

Installation Checklist
- Confirm PDLC / smart glass voltage & current specs
- Choose loop type (surface / concealed / mini / hinge)
- Measure cable lengths with door travel tolerance
- Order connector kit, conduit, grommets, strain reliefs
- Place transformer/controller in accessible location
- Test continuity before powering system
- Install and label all connections & photo-document
- Final commissioning and stress test through full door operation
FAQs
Q: What is a power transfer loop?
A: A power transfer loop (power loop / mini power loop) is a flexible protective conduit that carries electrical wires from a fixed frame to a moving door, protecting cables during motion and providing a neat, secure route for power and data.
Q: Can smart film be installed on operable doors?
A: Yes. Both factory-laminated switchable glass and retrofit smart film (PDLC) can be used on moving doors when wired correctly with a power transfer loop, busbar connections, and controller. Proper routing and strain relief are essential.
Q: Do I need a special transformer?
A: Use the transformer / power supply recommended by the smart glass / smart film manufacturer and size it with appropriate headroom. Check PDLC controller specs for exact voltage and current requirements.
Q: What’s the difference between a mini power loop and a full power loop?
A: A mini power loop is a narrower, low-profile flexible conduit for tight stiles or slim frames. A full power loop is generally larger and can carry more conductors or thicker cables for high-current devices.
If you’re planning a project with smart glass doors or wiring smart film and want expert help specifying a power transfer loop, transformer sizing, or installation best practices, contact Smart Glass Country’s technical team. We can provide wiring diagrams, spec sheets, and project consultation.
Have a question? Contact us and we will be happy to answer.


Subscribe to Our Newsletter
Never miss an update. Get all the latest news delivered directly to your inbox.